Easter Bliss

Showing posts with label Craft Box. Show all posts

Tuesday, 28 December 2021

Christmas Cards 2021

I hope you've all enjoyed a wonderful Christmas, just as we did. Lots of food, love and laughter. Santa was very generous to us all and our little princess felt very loved - especially by Santa! The lives of those no longer with us were remembered and celebrated.

Today I want to quickly show some of the Christmas cards that I made for family, neighbours and friends. 

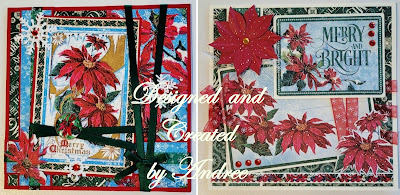
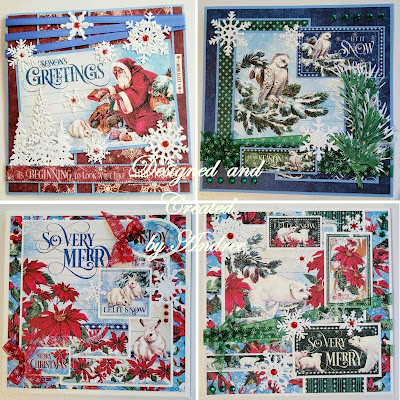
I used two sets of papers that I just couldn't resist. The first is the Let it Snow collection from Graphic 45. I haven't treated myself to G45 Christmas papers for a few years, so this collection was a real treat for me. 

I bought a bundle and other matching bits from My Creative Spirit which included the 12" (30 cm) and 8" (20 cm) papers, plus journalling cards, stickers and the 12" (30 cm) patterns and solids papers.

I made some 6"x 6" (15 x 15 cm) cards and some 5"x 7" (12.5 x 17.5 cm). I used gorgeous matching ribbons from Fantastic Ribbons. The plain card I used for the matting layers is from Limetree Craft.

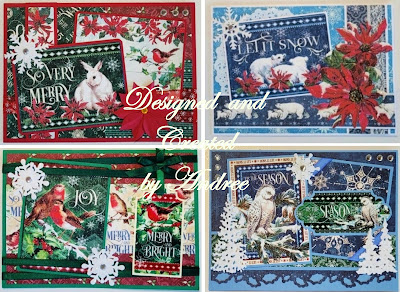
 I die-cut snowflakes, trees, ferns and poinsettias from dies I have in my stash as embellishments and added gems.

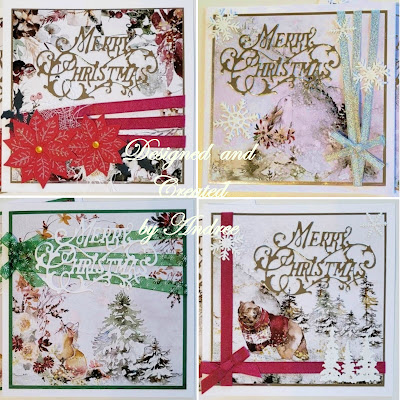
I also used the White Christmas 6"x 6" (15 x 15cm) papers from Craft Box to make some cards. The lovely artwork of this collection really caught my eye. They show some wonderful wild animals in beautiful watercolour snowscapes. All that was needed was some matting card, ribbon and a die-cut sentiment.

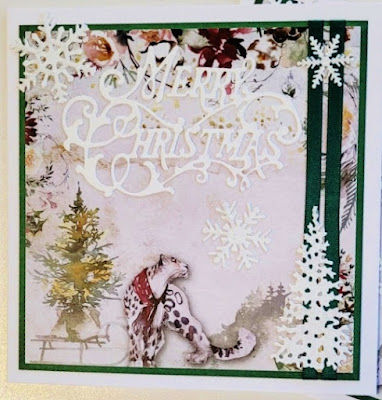
All the cards were finished with generous helpings of glitter.

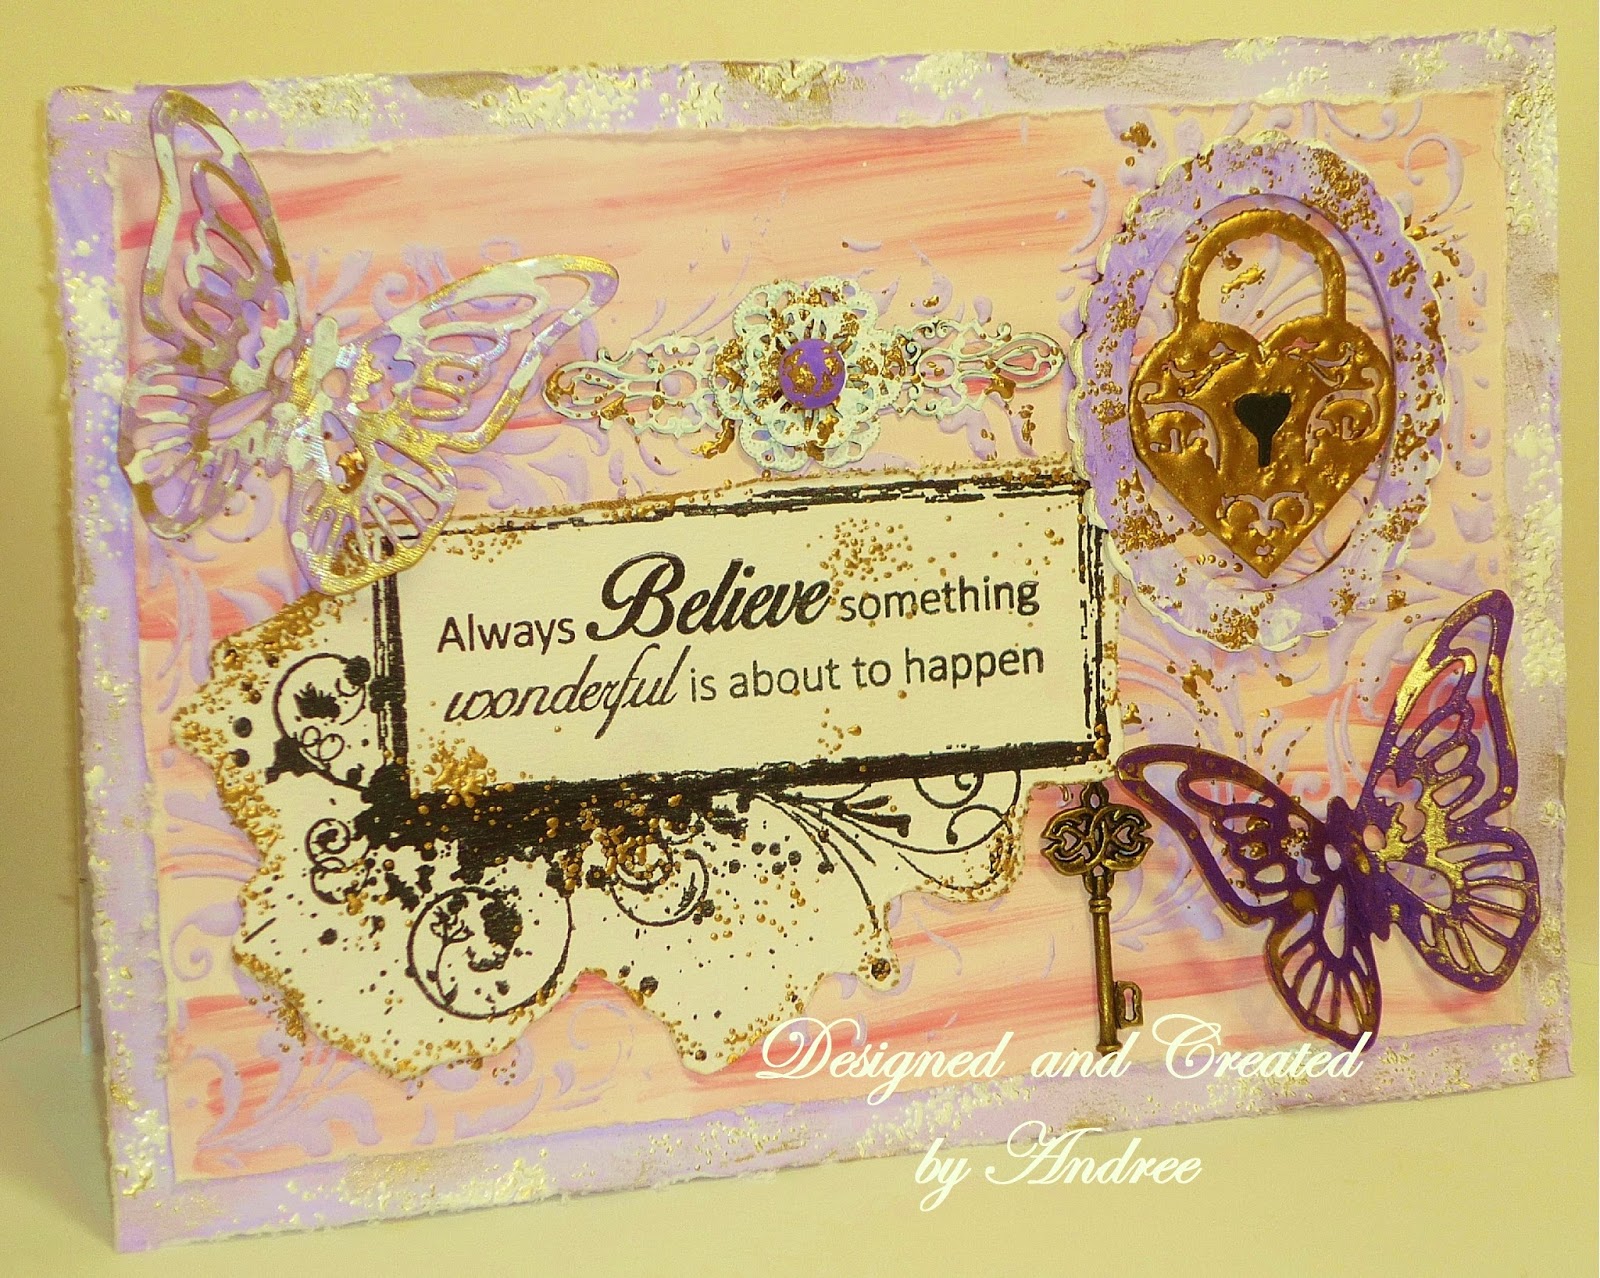
I hope you all enjoyed a wonderful Christmas, however you celebrated, and you now look forward to a wonderful 2022 with a heart full of hope.


Saturday, 26 August 2017

Craft Box Clipboard

Well, our weather over here in South Wales still can't make up it's mind about summer. We typically have a mixture of sun, rain, wind and fog. And that's just in a morning.
I cheered myself up this week by making this project. There were some lovely elements in the August Craft Box which I received at the beginning of the week. They included a board and a clip which I put together to make a clipboard. 

The board is 7.5" x 5.5" (19 x 14 cm). I started by adding some torn pieces of a craft newspaper and bits from the SnipArt trellis before a light coat of gesso.

Next I built up a platform using some stencilled card layers. I then cut up one of the metal filigrees and began adding some elements from the most recent Craft Boxes I'd received.

Those elements included a Steampunk charm, wooden pegs, mermaid cabochons and purple half pearls.

There were also paper roses, resin roses, Druzy sparkles and opal tiles. 
To colour the clipboard and elements I used four of my 13 @rts Ayeeda sprays - available in the UK from Artist Trading Post. The colours I used are Pastel Dirty Pink, Pastel Green, Pastel Turquoise and Chalk White.

I made the sentiment plaque by heat embossing white Frantage on a die-cut oval and using a Kaisercraft stamp with Stazon.  

My finishing touch was to add a seam binding bow I'd coloured with Distress Oxides.

 In parts of the UK this weekend it is a Bank Holiday, which means that Monday is a day off. There is no extra craft time for me though as we have house guests. Trust me they're not here for the weather.
I hope you all have a crafty weekend and lovely weather though wherever you are.

Friday, 3 March 2017

Creative Artiste #24 March 2017

Welcome everyone to my March challenge post for
Creative Artiste.
We are a challenge blog for everyone who likes to mix their media. So, as long as you like to use various mediums on your creations we'd love to see you enter the challenge.
A big Thank You to everyone who entered Challenge #23 in February. Your projects were fabulous and our winner has been announced on the blog. 

Our theme is always
"Anything Mixed Media Goes"

This month we are sponsored by our own DT member Judy who has arranged a prize of dies and stamps.

I have incorporated some stamps and a die in my project.


I started with a compass stencil and texture paste on an 8"x 8" (20 x 20 cm) base. I used watered down acrylic paints and some sprays to colour the background. Once dry I randomly stamped some travel themed stamps and then gave it all a white gesso wash.

I stamped and heat embossed the hot air balloon from Sheena Douglass onto watercolour card. I dripped on some spray colours and cut it out.


I created the rust effect border with acrylic paints and sand texture paste. The Harlequin die-cut is from Tim Holtz and was coloured with paints and inks. I layered on a piece of cheesecloth and dry brushed it with paint before fixing the hot air balloon in place with foam pads.


The embellishments are mostly from Craft Box. I painted some with acrylics and added beads to the wire bauble.


For the finishing touch I heat embossed the chipboard word with copper and gold powder.

This is a month long challenge so you have time to create projects and enter up to three times. A full list of the rules is on the challenge blog. For more inspiration please visit the Creative Artiste Challenge Blog to see the wonderful mixed media projects created by our talented team.  Remember to have fun and enter your "Anything Mixed Media Goes" creations in the challenge.

I've entered this project into the following challenges:
http://alteredeclectics.blogspot.co.uk/2017/03/new-month-new-challenge.html
http://rheddscreativespirit.blogspot.co.uk/2017/03/new-challenge-for-march.html x

Friday, 24 February 2017

Notebook Cover

Happy Friday everyone, I hope you all have something nice planned for the weekend. I shall be travelling down to Bournemouth to attend a few classes with the fabulous Finnabair. I'm very excited and hoping to learn a lot. In case I need to write anything down I shall be taking my mixed media notebook with me. 
This is a book where I write tips, craft recipes and ideas. It has a section where I add some samples  of my mixed media work and another section for colour, product and texture swatches.

The notebook pages are A5 in size. I cut a panel of card to fit the front of the book and gessoed it. Next I used a palette knife to add uneven patches of crackle paste.  Once that had dried I dripped and splashed some watered down black spray and splashed some red spray over the piece of card.

I hand cut a heart shape  from corrugated card, painted it red and randomly stamped and heat embossed in black. The frame was a plain wooden one to which I added texture paste. Once dry I painted it white and added some silver gilding wax.

I arranged the silver cogs (from my stash) and Steampunk embellishments (from Craft Box) and secured them with 3D gel. 

I sprayed the chipboard 'passion' in red and dabbed on some spots of silver gilding wax. I added a cog once it was stuck down. When everything was in place and dry I fixed the piece of card to the front of the notebook and blacked around the edges. 

The notebook has a plastic cover that protects it in my bag when I take it out with me. I finished decorating the notebook by tying some thin ribbons and cord threaded with beads to the top spiral.
I shall show some of the mixed media pages at a later date. I hope you have a lovely weekend whatever you're doing.

Saturday, 11 February 2017

Dreamcatcher Canvas

Welcome everyone. I hope you are all enjoying a nice weekend. The weather has turned very cold here in our little corner of Wales so I've been spending my time indoors crafting.
Ever since I got some Snip Art feathers in one of my fabulous Craft Box collections I've wanted to use them for a dreamcatcher.

This is an 8"x 8" (20 x 20 cm) canvas. I first applied a layer of gesso with a palette knife then I added some fluid acrylics in turquoise and teal. The third layer is crackle paste. Once that was dry I used a stencil and texture paste in the bottom left corner. Next came the fun with sprays and pigment powders in teal, blue and brown.

I made my own dreamcatcher. I cut the hoop from thick card, coloured it with Distress Inks and punched holes around it. I used gold embroidery thread to create the web, adding beads as I went along. I left three tails to attach the feathers. 
Behind the dreamcatcher is a heart cut from corrugated card that was painted with brown acrylics and randomly stamped with silver Frantage. I added a few layers of cheesecloth over the top and used paints and pigment powders to dull the bright white.

I finger painted the feathers in pale turquoise and teal acrylics then I added some Frantage. I darkened the edges with Distress Ink. I threaded some beads onto the gold thread before attaching the feathers.

The wooden butterfly was painted and Frantaged before I added a watch cabochon and some gears from Craft Box. The sentiment is also from Craft Box and was heat embossed in white. The heart locket and tiny key are also courtesy of Craft Box.
I really enjoyed putting this canvas together as it had been in my head for quite a while. I hope you've enjoyed looking at it.

I'd like to enter this project in the following challenges:

Friday, 2 December 2016

Creative Artiste #21 December 2016

The first Friday of the month means it's the start of a new challenge at Creative Artiste.  We are a challenge blog for everyone who likes to mix their media. So, as long as you like to use various mediums on your creations we'd love to see you enter the challenge. This is a month long challenge so you have time to create projects and enter up to three times. A full list of the rules is on the challenge blog.
A big Thank You to everyone who entered Challenge #20 in November. Your projects were wonderful and the winner has been announced on the blog. 

Our theme is this month is
"Anything Mixed Media Goes"
and we are sponsored by
         
Scrapmatts and Papertole Australia

I'm sharing a Christmas present I've made for a very special person in our family to use as a memory box.


I glued a piece of card on the top of one of my precious Craft Box boxes. Firstly I used texture paste through a star stencil and painted it all white. I then lightly rubbed gold gilding wax over the stars and edges.

I cut up some Retro Squares 02 from Scrapmatts and painted them white then added gold Frantage before sticking the pieces down. The vintage photos are from the internet and I printed them with a pinkish tinge. I added one photo to the beautiful cabochon from Craft Box and tucked some little detail pieces around the photos and flowers.

I placed a die-cut pink doily in one corner and used the Tim Holtz Tattered Flowers die to create the flowers with pearlised card. I Frantaged the edges and central pearls. The centrepiece on the large flower came from a bracelet.

As this is intended as a memory box I thought this sentiment from Bee Crafty was very apt. I stamped it in brown ink onto pink card.

Lastly I added pink ribbon and some floral lace around the box and finished off the front with a SnipArt frame and chipboard word. Both were painted pink and Frantaged.

Please visit the Creative Artiste Challenge Blog to see the wonderful mixed media projects created by our talented team and meet our new member who is joining us from today. 
As this is our last challenge for 2016 I'd just like to say a big Thank You to all our lovely followers and wish you all a Merry Christmas. We hope to see you all back in 2017.
Remember to have fun and enter your "Anything Mixed Media Goes" creations in the challenge.

I've entered this project into the following challenges:
http://alteredeclectics.blogspot.co.uk/2016/11/december-challenge.html
http://rheddscreativespirit.blogspot.co.uk/2016/12/decembers-challenge.html x

Sunday, 23 October 2016

Canvas Birthday Card

I hope you are all enjoying your weekend. Mine is passing by in a blur of busyness but I wanted to take time out to show you a birthday card I made recently.
This card is based on the canvas I made for the current Creative Artiste challenge. It's A5 in size, so a good deal smaller but the main elements are there.

I started by painting a panel of mixed media card in lilac acrylic. I scruffed the edges and added Shabby White Frantage and Pebeo gold gilding wax. The next layer was created with a couple of acrylic paints in pinks. I then used lilac coloured texture paste through a Tim Holtz flourish stencil and splattered with gold Frantage. Again the edges were scruffed before I mounted both layers on to a card blank.

I used a frame stamp and the Believe verse stamp from Bee Crafty to create the sentiment panel. I cut around it, scruffed it and added Frantage. I used metal charms from Craft Box to create the flower above the sentiment. I painted them white, added a painted purple half bead and Frantaged.

I painted and Frantaged a wooden frame. The heart locket is an X-cut die that I gold embossed. I die cut two butterflies from card and dabbed them with gold gilding wax. I added a brass key.

To finish I dabbed white acrylic onto the second butterfly with the gold gilding wax.
I'm pleased to say that the card arrived safely at it's destination so I can now show it.
The original canvas can be found here. It now lives with one of my daughters.
I hope you all have a lovely week. I'd better get back to work.

Friday, 7 October 2016

Creative Artiste #19 October 2016

Yay! It's Friday and the weekend is starting early for me as it's my youngest grandson's first birthday. There will be plenty of fun, family, presents and party food all weekend. I hope you all have something nice to look forward to too.
The first Friday of the month means it's the start of a new challenge at Creative Artiste  We have some fabulous new DT members to announce today and would love you to visit the blog and show your support for them.
Creative Artiste is a challenge blog for everyone who likes to mix their media. So, as long as you like to use various mediums on your creations we'd love to see you enter the challenge. This is a month long challenge so you have time to create projects and enter up to three times. A full list of the rules is on the challenge blog.
A big Thank You to everyone who entered Challenge #18 in September. Your projects were wonderful and the winner has been announced on the blog.

Our theme is this month is
"Anything Mixed Media Goes"
and we are sponsored by

The Dusty Attic


I have a 12" x 10" (30.5 cm x 25.5 cm) canvas to show today.

I started by colouring the background in horizontal strokes of two shades of pink acrylic. I then used a Stamposaurus stencil with homemade lilac coloured texture paste. While the paste was still wet I added gold Frantage and heated.

I used a frame stamp and the Believe verse stamp from Bee Crafty to create the sentiment panel. I cut around it and added Frantage. I used two metal charms from Craft Box to create the flower above the sentiment. I painted them white, added a painted purple half bead and Frantaged.

I made the frame using a Katy Sue silicon mould. Once dry I painted it lilac and edged with gold gilding wax. The heart locket is an X-cut die and gold embossing powder. The chipboard branches were painted white and sprinkled with Frantage.

I sprayed the three roses with violet Artiste Spritzing Ink then added gold gilding wax. I finished the canvas with the DREAM key from Craft Box.

Now please visit the Creative Artiste Challenge Blog to meet the new DT members and see the wonderful projects created by the talented team. Remember to have fun and enter your "Anything Mixed Media Goes" creations in the challenge.

I've entered this project into the following challenges:
http://alteredeclectics.blogspot.co.uk/2016/10/october-challenge.html
http://rheddscreativespirit.blogspot.co.uk/2016/10/october-challenge.html
http://welove2create.blogspot.co.uk/2016/09/challenge-20-anything-creativemixed.html
http://thatscraftychallenges.blogspot.co.uk/2016/09/all-of-sparkle-challenge.html