Easter Bliss

Saturday 22 December 2012

Merry Christmas Everybody

If you are reading this, then the world didn't end on 21/12/2012!  I'm glad it didn't as it was my birthday and I had a lovely day with friends and family. I received lots of fabulous handmade cards and good wishes from my crafty friends and I thank you all for making my day extra special.
I did make Christmas cards for some of my crafty friends, but for those I didn't - and as an extra for those I did - I've made this Christmas card to show my appreciation to you all for following my blog and taking the time to leave lovely comments. I'm grateful for every one, thank you very much.


I layered a paper I created in MCS on silver mirri and matted onto an 8" x 8" card blank.


I used the Tree Trio stamps from Visible Image and embossed them with Snowflake embossing powder.


The sentiment stamp is also from Visible Image and the ribbon is from my stash.

Have a wonderful Christmas everybody and a fantastic New Year!
Love and hugs,
Andrée xx
 

Saturday 15 December 2012

DCC & Friends # 5 Midway Inspiration

It's time for some mid-way inspiration at DCC & Friends. Our theme this month is "Christmas Time" and the challenge is sponsored by the fabulous Visible Image who will be sending £35 worth of stamps to the very lucky winner.
I have made my DT card using the Visible Image Tree Trio set of stamps and I'd like to enter this card in the Visible Image Christmas Challenge.


I started by using Distress Ink Antique Linen around the edges of an 8" x 8" card blank and then matting and layering gold mirri, blue Papermania textured card and a paper from MCS Quintessential Country Garden to which I added snowflakes before printing. I also wrapped lace, threaded with a chipboard sentiment, around the layers before attaching to the card.


I stamped the largest of the trees in blue ink and double embossed it. I then used DI Antique Linen to colour tint the card before matting onto gold mirri and using foam pads to attach to the card.


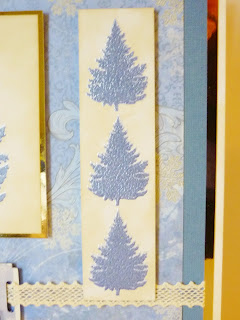
I stamped the smallest tree four times in a vertical line and double embossed them. I coloured the card with DI, cut off one tree, and raised the panel on foam pads.


I cut out the remaining small tree and fixed it at an angle in a bottom corner then finished the card with gold candi.
 
Please visit the Visible Image online shop to see their range of fabulous stamps and for your associated stamping needs. And please check out the DCC& Friends challenge blog for a full list of rules and to submit your entry. We look forward to seeing your "Christmas Time" crafty creations. You have until the end of the year.

PapercraftJunkies # 6

Welcome to our last challenge of the year at PapercraftJunkies. Thank you to all who took part in Denyse's Embellish It! challenge. The standard of entries was very high and Denyse will be announcing the winners in a few days time.
There are lots of fabulous digi images in the PapercraftJunkies shop where there is a terrific sale on at the moment and even a freebie section. There have been lots of recent additions to the shop including some fantastic background scenes.
Challenge # 6 is hosted by the lovely Dawn and the theme she has chosen is "Bingo Board". That means you follow either a line across, down or diagonally to include three elements.  Or you could use everything for a full house!  You will find the board further down this post.

For my card I went down the left hand side and used Ribbon, Flowers and Buttons.


I used a paper from MCS Quintessential Country Garden and matted it onto silver mirri board. Before attaching to the 8" x 8" card blank I wrapped a turquoise ribbon around it. I also inked the edges of the blank with Distress Ink Salty Ocean.


I used the fantastic Flower Heart digi and changed the colour of the outline drawing to blue using MCS. I then coloured the flowers, vines and leaves with Promarkers and matted it onto silver mirri.
This image will look wonderful coloured with reds for Valentine's Day.


The paper flowers are from Wild Orchid Crafts. I tied a bow with the ribbon and found some flower and heart buttons in my stash which matched the card perfectly.

Here is the board for you to play along with.

Head over to the Challenge Blog where you can see the fabulous projects our Design Team have been busy creating to hopefully inspire you for this challenge.
There are fabulous digi prizes and badges up for grabs for the lucky winners. The challenge winner will win 4 PapercraftJunkies digi images from the shop if they've used a PCJ image on their entry, otherwise, the winner can choose 3 PCJ digi images. They will also receive the code for a winners badge.
Also, 3 favourites will be chosen to receive one of the fabulous blog badges as shown in the side bar where you'll find a full breakdown of the prizes and rules too. You have until 9:59 am on December 31st 2013 to enter your crafty creations, we can't wait to see what you make.


Have a wonderful Christmas and a great New Year. We hope to see you all in 2013!

Tuesday 4 December 2012

Papermania Christmas

I thought I'd share one of my favourite Christmas cards that I've made this year. I also thought it would be perfect to enter into the current challenge at That Craft Place where the theme is No Squares Allowed.


I fell in love with the fantastical fantasy artwork on the Papermania Enchanted DVD as soon as I saw it. The Christmas images are beautiful and I simply adore this one. I die cut the image, gold mirri and white Centura Pearl with Spellbinders Scalloped Circles then matted the image onto the gold mirri and folded the largest circle in half to create the base.


I glittered the edges of the fairy's holly leaf wings and spot glittered the rest of the image. I made three stick pins with gold wire and beads from my stash and fixed them with Pinflair, then added a bow.


The sentiment is from the DVD, I think the font is wonderful. I printed it out and matted it onto gold mirri. I finished off the card with red gems.
I'm not sure who's going to receive this one for Christmas.

Saturday 1 December 2012

DCC & Friends #5

Welcome to my third post of the day and to Challenge #5  at DCC & Friends. Thank you to those who took part in our Autumn challenge, the lucky winners will be announced soon. This challenge will run until the end of the year - it's not that far away now! The theme this month is "Christmas Time", how very appropriate, and our sponsor is the fabulous Visible Image who will be sending £35 worth of stamps to the very lucky winner. See below for a photo of the prize and a list of the stamps.

I have made my DT card using the Visible Image Tree Trio set of stamps. I'm not really much of a stamper (I love my digis too much) so I had a play around with these lovely stamps using some different types of card and inks before coming up with the idea for this card. I hope you like what I've done.


I covered the front of an 8" x 8" card blank with white Centura Pearl and some green ribbon. I stamped a cluster of the trees onto Centura Pearl card with Evergreen Bough Distress Ink using a couple of masks. I stamped the large tree separately and cut that out leaving a white border. I wrapped some small baubles on a string around it and mounted it onto the topper with foam pads. I was aiming for a scene of trees on a snowy hillside and I just loved the faded effect created by using my combination of card and ink.


I matted the topper and the sentiment - also from Visible Image - onto green Papermania textured card. The leaf flourish dies are from Cheery Lynn. I coloured them black to match the sentiment, cut them up and tucked the ends behind the topper.


I stamped the smallest tree three times as before, and cut them out. I mounted them on foam pads and finished the card with a bow.
I'd like to enter this card in the Visible Image Christmas challenge

This is the fabulous collection of stamps from our sponsor Visible Image for the lucky winner.

 
They are: Live Well, Calligraphy Corner, Corset, Blow Out the Candles, Happy Birthday, However you spend it, Bronte Border, Good Luck Cat Set, Live Your Dreams and Large Butterfly.
 
Please visit the Visible Image online shop to see their range of fabulous stamps and for your associated stamping needs. And please check out the DCC& Friends challenge blog for a full list of rules and to submit your entry. We look forward to seeing your "Christmas Time" crafty creations.

PapercraftJunkies #5

Welcome to my second challenge post of today and to PapercraftJunkies challenge #5. The lovely Denyse is hosting this fortnight's challenge and the theme she has chosen is "Embellish it". That means your crafty project can be any theme but it has to have at least one handmade embellishment on it. There are fabulous digi prizes and badges up for grabs for the lucky winners, and a bigger prize if you use a PapercraftJunkies digi on your project. There are lots of fabulous digi images in the PapercraftJunkies shop where there is a terrific sale on at the moment and even a freebie section.


I got the inspiration for my DT card from the beautiful Doodle Christmas Tree digi that Tracey designed. I love the scrolls that the tree is made from and wanted to create a similar effect from wire. You get a ready coloured digi and a black and white outline digi for this image making it super value.


I used a 6" x 6" card blank and covered it with gold mirri matted with a red Papermania textured card. I printed the coloured tree digi onto green card and matted it onto gold mirri. I used a white pen to add highlights to the scrolls and decorated the tree with some red and green gems.


To create my embellishments I used some gold wire and red and green beads from my stash. I wound the wire around my Papermania bow maker, threading it with the beads at intervals. I tucked the ends of the wire embellishments behind the sentiment and secured with Pinflair. I finished the card with some more red and green gems in the top corners.

Head on over to the PapercraftJunkies challenge blog for more inspiration from the other DT members and a full breakdown of the prizes and rules. You have until 9:59 am on December 15th to enter your crafty creations, we can't wait to see what you make.

Let It Snow

Welcome to Challenge #11 at Emma's Cards and thank you to all who entered the previous challenge. The entries were fantastic and the lucky winners will be announced in a few days time. The theme for this month is "Let it Snow" and is being sponsored by Visible Image who are offering a bumper bundle of stamps worth £35 as the first prize. See below for a photo of the prize and a list of the stamps.
If you take a look at the challenge blog you will see the fabulous cards that the other DT members have made to inspire you. Here is my card for your inspiration.


I inked the edges of an 8" x 8" card blank with Festive Berries Distress Ink and layered with a white card I'd embossed with a small Sheena Douglass Ivy Leaf embossing folder. I lightly wiped over this with Mowed Lawn DI. The holly wreath was created by using a Sheena Douglass holly stamp set and coloured using Promarkers. I cut out the leaves, shaped them and positioned with Pinflair to give some depth and dimension.


The poinsettias are a Marianne die that were coloured with Promarkers and the sentiment sash is a strip I cut from a backing paper I made in MCS for another card.


I spot glittered the leaves and flowers and finished the wreath with a triple bow using ribbons from my stash.

This is the fabulous collection of stamps from our sponsor Visible Image for the lucky winner.


They are: Live Well, Calligraphy Corner, Corset, Blow Out the Candles, Happy Birthday, However you spend it, Bronte Border, Good Luck Cat Set, Live Your Dreams and Large Butterfly.
So, to be in with a chance of owning all of these wonderful stamps, you'd better get making. We can't wait to see your creations over at Emma's Cards, remember that your entry doesn't have to be a card, just a crafty make that fits the theme "Let it Snow". You have until the end of the year!

Saturday 24 November 2012

Mermaid Ocean

Here is another wonderful digi image from Jem's Designs that I was given to work with. Her name is Mermaid Ocean. I love mermaids and was keen to play with this one. I hope you think I've done her justice.


I first inked the edges of an 8"x8" card blank with a blend of Salty Ocean and Shaded Lilac Distress Inks. I had the perfect backing papers for this image, they are both from the Enchanted Dreams CD by Joanna Sheen. I matted them both onto gold mirri card.


I coloured Mermaid Ocean with Promarkers and inked the edges with the same blend of Distress Inks before mounting her on foam pads. The small gold die-cut on her shell headdress is a piece of waste from a Spellbinder die that I thought looked like a crown.


The die -cuts are Marianne shells, starfish and misletoe leaves, but I think they look like seaweed. There is also a small Spellbinders die-cut from a leaf set. I printed an oyster shell with a pearl a few times and decoupaged the image.


I finished by coiling some lengths of wired ribbon and fixed them behind the shells to look like seaweed.
There are more mermaids and other beautiful digi images available on the Jem's Designs website, please pay a visit and see for yourself.

Thursday 15 November 2012

PapercraftJunkies #4

Today is the launch of a new challenge at PapercraftJunkies and it’s my turn to host this fortnightly challenge.  Thank you to everyone who took part in the last challenge, the winners will be announced in a few days.
We have a fantastic theme this time, it’s “White on White”. Your image can have some colour but we’d like to see everything else in white. You can enter any kind of craft project, providing it follows the theme. There are quite a few prizes on offer for different categories, so check out the sidebar on the challenge blog for the details and the rules.  You have until 10am on the 1st December to enter, so to give you some inspiration here is my DT card.


I covered the front of an 8"x 8" card blank with white Centura Pearl to which I'd attached a length of wired white patterned ribbon. I then embossed a piece of white card with a snowflake folder that came free with a magazine. I edged the panel with a silver Promarker.


I used the Christmas Snow People image and coloured the black and white version with Pastel Blue, Pale Pink and Ice Grey 1 Promarkers. I used a silver Promarker around the edges for definition. I think the image is so cute with the little birds in the center. The sentiment is a silver peel-off.


For my embellishments I used a Marianne poinsettia die and snowflake dies and a Cheery Lynn small leaf flourish die. They were all cut from plain white card and spot glittered. To finish with I tied a bow with the white wired ribbon.

Don't forget to visit the PapercraftJunkies Challenge Blog to check out the fabulous cards from the other Design Team members to give you some more inspiration. Everyone has, of course, used images from the lovely Tracey and they can all be found in the PapercraftJunkies Shop. There are some wonderful freebies up for grabs too, so make sure you pop by to have a good look.


Tuesday 6 November 2012

Steampunk Daniella

I'd like to introduce Steampunk Daniella. She is one of the beautiful new digis available from Jem's Designs. As a member of the Digis by Jem's DT I was offered Daniella to work with and I was thrilled, I just love her hair. Although her title is "Steampunk Daniella" I decided to give her a garden to play in.


I inked the edges of an 8"x8" card blank with Distress Ink Bundled Sage and then layered a paper from MCS Quintessential Country Garden. I wrapped a green wired ribbon around the bottom section before placing on the card base. I used a Spellbinder die to cut a border and used DI Spun Sugar and Festive Berries to colour it before layering it over the ribbon. I created another paper whilst in MCS by layering a music sheet from  FREE ViNTaGE DiGiTal STaMPS  over a brown backing paper. I also printed off a few roses several times to decoupage.


I used an X-Cut die to cut out Daniella and the music paper and coloured Daniella with Promarkers. I inked the edge of her frame with DI Spun Sugar and used DI Bundled Sage over the music die-cut. I fixed the music sheet flat and set Daniella on foam pads.


I used dies from Marianne and Cheery Lynn to create the flowers and leaves. They were coloured with Distress Inks and arranged either side of Daniella with the decoupaged roses.

 
I used a Joy Crafts die to cut two butterflies and mounted one on the other for dimension. They were coloured with Distess inks too. For the finishing touch I added three pink heart shaped buttons with coiled green thread.
Don't forget to visit the Jems website to browse the digis, there are new ones being added all the time. 
I'd like to enter this card in the challenge at That Craft Place, it's one of my favourite themes: Tic, Tac, Toe. I went down the right hand side with Dies, Border and Buttons.

Monday 5 November 2012

DCC and Friends Midway Inspiration

There is still time to enter the current challenge  at DCC & Friends as it runs until November 20th. There are some fabulous prizes up for grabs. We have two sponsors this time, so, two overall winners. Firstly we are sponsored by Creative Expressions, the fabulous Sue Wilson has donated two A5 stamp sets. Visit her blog at PartiCraft and secondly PaperCraftJunkies, Where Tracey is offering 4 of her digis of the winner's choice. There will also be a "Top Three" who will be awarded badges. So, plenty of opportunities to win. 
Visit the blog to see more inspiration from the team and check out the showcased entry.
The theme is "Autumn to You" and I've made another card to give you some midway inspiration.


I started by cutting an 8"x8" card blank into a circle and inking the edges with Distress Ink Tea Dye.
I then used a Spellbinders scalloped circle die to cut the backing paper.  Both the leaf backing paper and the circular topper are from a Hunkydory kit from last year. I punched two holes in the leaf paper and threaded organza ribbon through before attaching to the base card.


I die cut a mat from some russet coloured card for the adorable little hedgehog topper and the Hunkydory sentiment from the same kit. I just love this image of the hedgehog, he looks so comfy and cute tucked up in a bed of leaves.


I fixed the sentiment to the bottom right of the card to enable it to stand and added a small piece of die cut waste and a pearl. The finishing touch is some Candi round the scallops.
These chilly nights are just perfect for staying in and crafting, the perfect opportunity to make something for the challenge.
Remember that your entry can be any crafty make as long as it follows the Autumn theme and be sure to collect your Treasure Hunt letter for an added chance to win a crafty prize. 


Thursday 1 November 2012

PapercraftJunkies Challenge #3

Welcome to a new challenge at PapercraftJunkies, which runs until 14th November. The winners of the previous one will be announced in a few days. Thank you to everyone who took part and we hope you will join in with challenge #3.
There will be two winners for this challenge, one for using a PCJ digi and one for using any other image, there will also be a badge for three runners-up to put on their blogs. The prizes will be a digi of the winners' choice. Don't forget that it doesn't have to be a card you enter, it can be any crafty make as long as it follows the theme.
The theme this time is "Something with Wings" and here is my DT card to give you inspiration.


I started by covering an A5 card blank with a paper I printed from MCS Quintessential Country Garden CD. I printed a second paper and cut it in an oval using an X-Cut die and inked around the edge with Memento Rich Cocoa. The gate is from the MCS Quintessential Country Garden paper pack, which I coloured with Distress Ink Antique Linen.


The butterflies were created using digis from the  PapercraftJunkies shop. I made the larger butterfly with the Butterfly Wing set and added a hand drawn body.  The digis come in a black and white version and also a coloured example. I wanted to choose my colours to match the papers I'd selected so I coloured the wings using Promarkers.


I used the Fairy Wing set to create  the smaller butterfly. I coloured this one with Polychromos. Again, I hand drew the body, coloured it black and then added black Cosmic Shimmer PVA. Both butterflies have been mounted on the card with foam pads to give them dimension.
I finished off with some flowers from Wild Orchid Crafts and some organza ribbon from my stash. Then I dotted Cosmic Shimmer liquid pearls around part of the oval and as butterfly trails.
Dont forget to visit the PapercraftJunkies shop to check out all the fabulous digis Tracey has designed, you will even find some fantastic freebies. Check out the other DT cards on the challenge blog, and make sure you enter the challenge, we look forward to seeing your creations.

Emma Cards Challenge #10

Welcome to Challenge #10 at Emma's Cards and a big thank you to all those who took part in the previous challenge. The entries were fabulous and the winners will be announced shortly.
This challenge runs until 30th November and the theme is "Brown and Blue". Our fantastic sponsor this month is Kanban's brand new retail outfit "Crafted by You" and there will be a Kanban goody bag full of crafty loveliness for the lucky winner.
Here is my DT card to give you a touch of inspiration:


I inked the edges of an 8"x8" scalloped card with  Memento Rich Cocoa and layered with a textured blue Papermania card which I'd stamped with seagulls. The side panel of sailing boats is from the Forever Friends "The Good Life" paper pack from  Docrafts.


The lighthouse scene is from Kanban and I stamped it using Rich Cocoa and coloured it with Polychromos using just shades of brown and blue. I die-cut it out and inked the edges with Distress Ink Antique Linen.


The shells, anchor and seaweed (actually mistletoe twigs)  are all Marianne dies. I coloured them all with a mix of Antique Linen and Rich Cocoa. The seagull is from the Kanban lighthouse stamp set which I cut out and the sentiment is a gold peel-off on a couple of punched circles. I finished off with some dots of Cosmic Shimmer liquid pearls.


Why don't you pop over to the Emma's Cards challenge blog where you will find the other DT cards and the list of rules. Then you'll be all set to make your entry and be in with a chance of winning a Kanban crafty goody bag.
 

Wednesday 31 October 2012

Engagement Card

We are very pleased in our family that our neice has announced her engagement to her long term boyfriend. I love occasions like this as they give me an excuse to make a special card.


I used an 8"x8" card blank and covered it with Adorable Scorable card in a soft green. I've had the Morehead CD from Crafter's Companion for a while and I've been itching to use this image. I think it has a real fairytale quality and see it as a couple on the road to marriage. So I thought it was perfect for this happy occasion. I matted and layered a matching backing paper from the Morehead CD onto gold mirri and did the same with the image.


To embellish I added a strip of lace down one side. I cut the Cheery Lynn leaf flourishes from gold mirri and added flowers from  Wild Orchid Crafts and used them to fix the ends of some twirled organza ribbon. The sentiment was created in MCS using one of the tags from the CD.


As a final touch I attached a charm of a fairytale castle as we wish the happy couple a fairytale marriage.
I'd like to enter this card in the challenge at the Kraftyhands blog where the theme is "Charmed".

Tuesday 30 October 2012

Steampunk Charlie in Paris

Well, the big day is here at last. Jem's Designs have released the first of their digital images for you to purchase and play with. Find the selection of wonderful images here on the Jems website.
I am so lucky to be on the Digis by Jem's DT and the first digi image I was given to work with was the fabulous "Steampunk Charlie". I couldn't wait to get started and this is my first card with her.

 
I thought she had a French look about her so I used an MCS backing paper from Tinkering with Steampunk and superimposed a digital image from FREE ViNTaGE DiGiTal STaMPS of the Eiffel Tower to one side. I sized and then printed Charlie and some French ephemera from The Graphics Fairy.

 
I matted and layered the backing paper onto black card and an 8"x8" card blank. I chose a bold colourway of red and black for Charlie and used Polychromos to colour her in. I die cut the French labels and inked them up with Distress Ink Antique Linen to give them a vintage look.


As the digi is called Steampunk Charlie, I die cut some Donna Salazar cogs out of black card to use as steampunk embellishments and added Cosmic Shimmer pearl drops to the centers.
Steampunk Charlie is is only one of the digis realeased today, so pop over to the Jems website to have a look at the others for sale and watch this space for another Steampunk Charlie card.