Wednesday, 5 November 2014

Emporium of Curiosities Debut

Today and tomorrow sees the debut of a fabulous new CD from Kraftyhands on the British Craft Network. It's called Emporium of Curiosities and is packed full of the most gorgeous vintage and Steampunk images and papers. There are toppers, postcards, embellishments and more.
Here are some samples I created with the CD.

I scruffed the edges of blue card and the images, added lace and die-cut feathers.

A simple card using a couple of papers and postcards as tags.

I created a base for the wonderful vintage paper and image by Frantaging some SB die-cuts. I added frantaged butterflies and some pearl flowers.

Here I've used  some elements from one of the card making sets. I embossed around the clock face and the center of the paper buttons. A doily and a corner die-cut are the only items I added.

Here I've layered up some beautiful papers and postcards with die-cut clocks. I've added Frantage to some of the corners.

So many of the papers and images can be used for either male or female cards. Here I prettied a postcard topper by adding a bunch of roses I cut from one of the backing papers.
Make sure you watch the Kraftyhands shows on the British Craft Network to see more samples and some fabulous demonstrations by the boys.
The CD is available from the Kraftyhands webshop.

Sunday, 2 November 2014

Scribble & Scrap Challenge #30 Reminder

This is a reminder for challenge #30 at Scribble & Scrap. The current challenge runs until 6pm (GMT) on Saturday. A full list of all the rules is on the blog. The theme for Scribble & Scrap is always "Anything Goes".
My DT card features some of the gorgeous products available in the Scribble & Scrap shop.

I started by making a frame from a Whimsey corner die as a mat for a dark purple spotty paper from the Simply Gorjuss 8x8 paper pack. I then layered them onto pearlescent purple card. I wrapped an organza ribbon around the layers and mounted them onto an 8x8 card blank and inked the edges. I made the flowers from an X-cut die set.

I used stamps from the Gorjuss Toadstools stamp set for the image and coloured it with my Promarkers. I then die-cut it and inked around the image lightly before adding it to the front of the card.

I finished the card with an organza bow and a wooden hedgehog from my stash. 

I've entered this card in the following challenges:


Sunday, 26 October 2014

Scribble & Scrap Challenge #30

Welcome to Challenge #30 at Scribble & Scrap. Thank you to all who joined in with challenge #29, the winners have been announced on the blog.
The theme for Scribble & Scrap is always "Anything Goes" and there is a full list of all the rules on the blog.
My DT card features some of the lovely products available in the Scribble & Scrap shop.

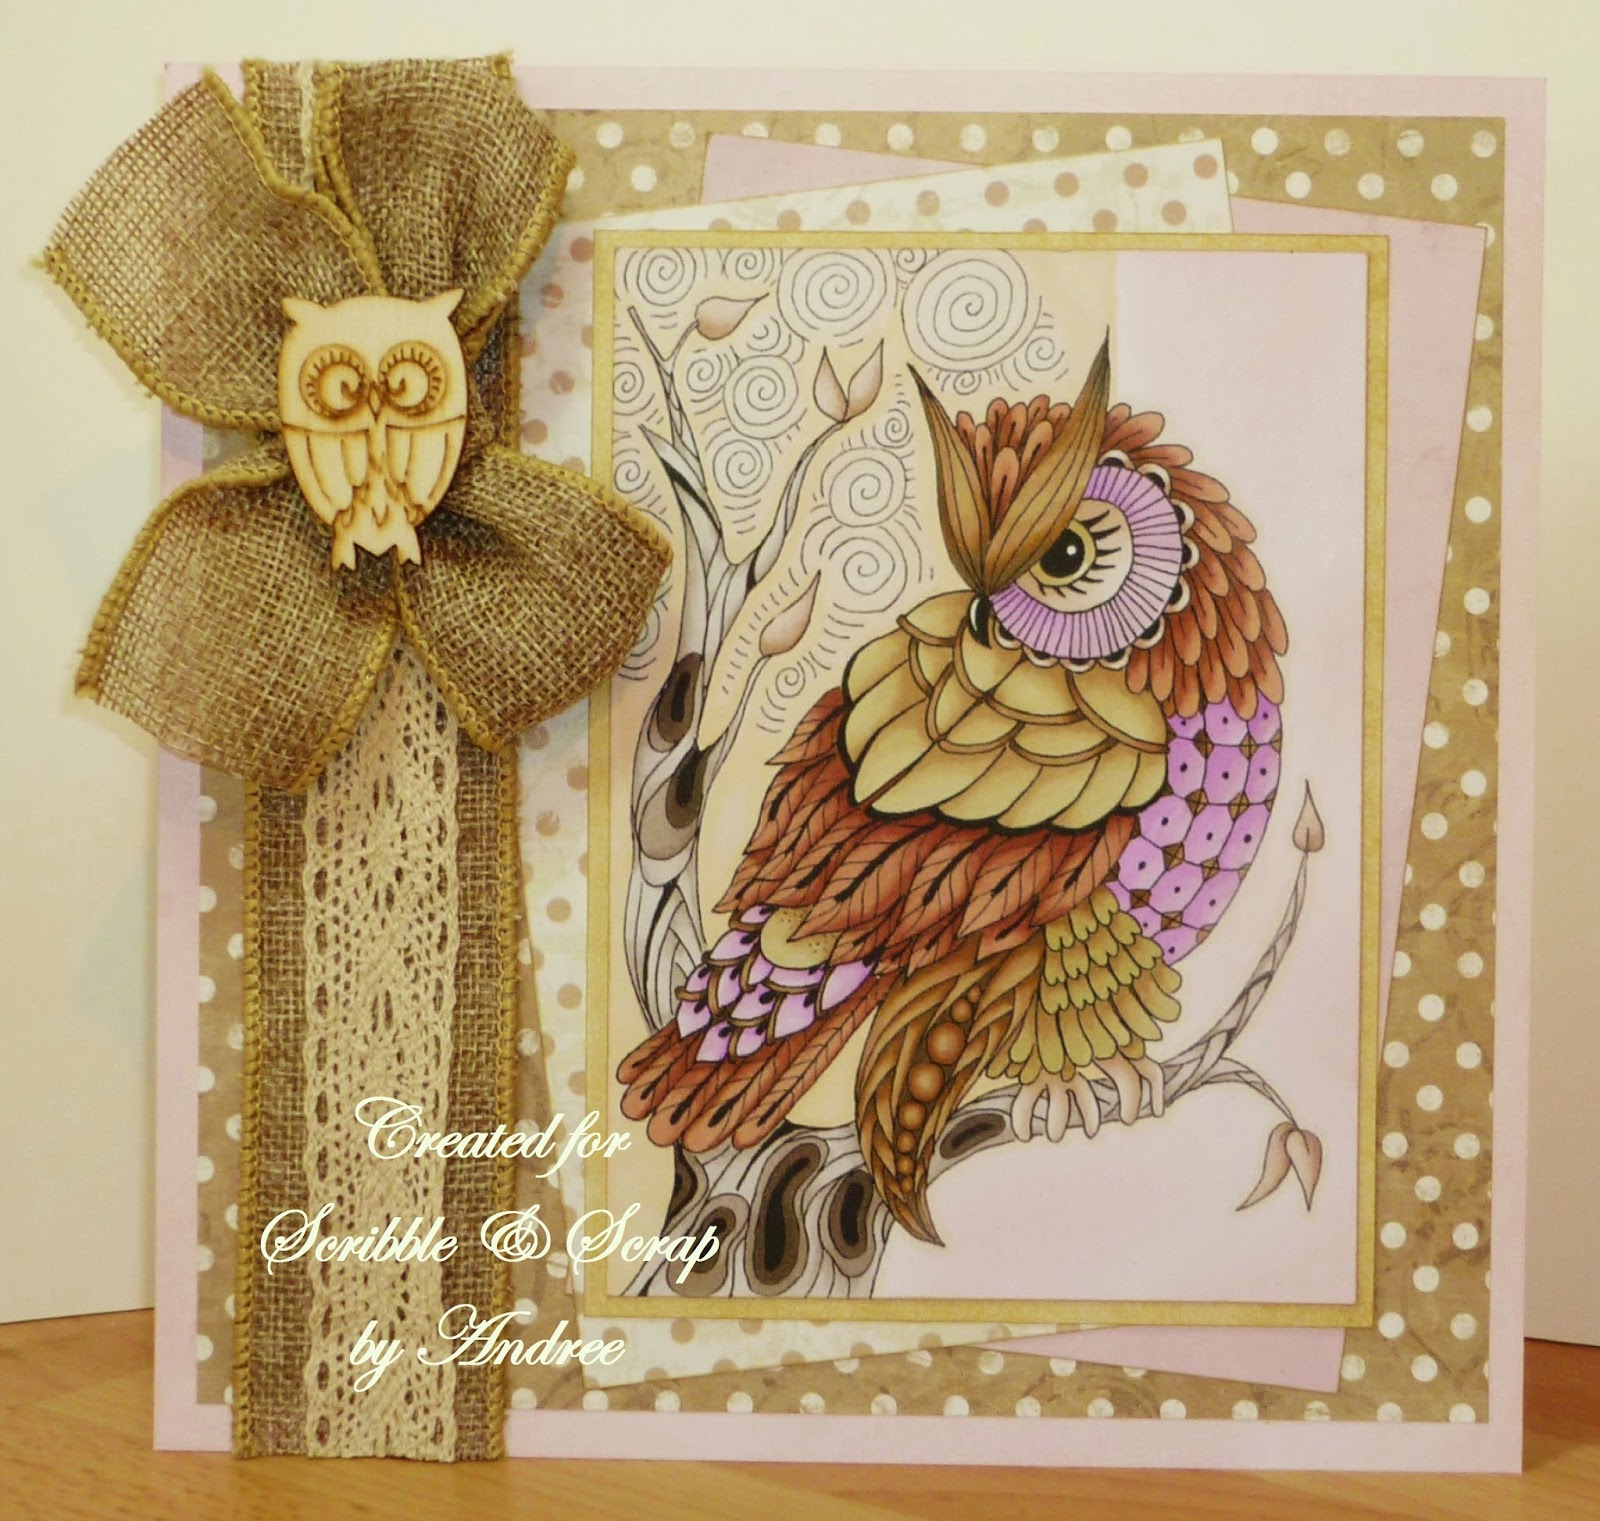
I used Pan Pastel Permanent Red Tint to edge a card blank then layered up some First Edition Rose Garden papers. I added a strip of hessian ribbon and some lace from my stash.

The new Sweet Pea Norma J Burnell stamps in the shop are proving very popular and I enjoyed colouring the Fairy Tangles Moon Owl with my Promarkers. I matted the image onto plain beige card.

I finished the card with a hessian bow and a wooden owl from my stash.

The new 5 Day Deal over at Scribble and Scrap Crafts has just started and from now until 9am Friday (or while stock lasts) all the Craftwork Cards range in the shop is reduced by 10%.  All you need to do is select your items and add the code Craftwork10 at checkout.  Make sure you remember to add the code as the discount cannot be applied once you have completed checkout.  

I've entered this card in the following challenges:

Sunday, 19 October 2014

Scribble & Scrap Challenge #29 Reminder

This is a reminder for challenge #29 at Scribble & Scrap. The current challenge runs until 6pm (GMT) on Saturday. A full list of all the rules is on the blog. The theme for Scribble & Scrap is always "Anything Goes".
My DT card features some of the gorgeous products available in the Scribble & Scrap shop.

I matted and layered papers from the Lillibet 6x6 Designer Paper Pack and Curiosity Corner 6x6 Paper Pack on to pink card and added a length of lace from my stash. The sentiment is from Curiosity Corner Sentiment Stamps set.

The stamped image is Lillibet Clear Stamp - Holding Flower and was coloured with my Promarkers. I die-cut the image and mounted onto a Cream Circular Doily which I inked with Spun Sugar Distress Ink. I finished the card with a couple of paper flowers and a big bow.

Please visit the Scribble & Scrap Challenge Blog to see some more DT cards. And make sure you visit the new look Scribble & Scrap shop to see all the lovely crafty products and grab a bargain. International shipping is now available.

The new 5 Day Deal over at Scribble and Scrap Crafts has just started and from now until 9am Friday (or while stock lasts) all the Hobby House range in the shop is reduced by 10%.  All you need to do is select your items and add the code HobbyHouse10 at checkout.  Make sure you remember to add the code as the discount cannot be applied once you have completed checkout. 

I've entered this card in the following challenges:

Wednesday, 15 October 2014

Graphic 45 Triptych

I was trying to find a photo among the jumble of pictures on my computer when I came across a folder of Graphic 45 cards and projects that I have made and not blogged. I'd like to share one of those with you today. I've loved G45 papers for a couple of years now and earlier this year I couldn't wait to get my hands on the beautiful Botanical Tea papers. This is one of the first things I made with the 12"x 12" papers.
I created this triptych frame for a dear friend, but as she hasn't been well for some time, I was only recently able to give it to her.

The frame is plain cardboard that I painted with silver Artiste acrylic paint. I cut six identical pieces and removed an aperture in three of them. I glued the aperture pieces to the backs, adding a couple of short lengths of lace in between to attach them in a row. I left the tops unstuck so I could slide the main picture into the center of each one.

After deciding on the main piece of artwork for each frame, I fussy cut matching images for the outside of the frames.

I covered those images with a couple of layers of Modge Podge to give them strength. I mounted some of the artwork on foam pads for depth.

I decoupaged some of the flowers and butterflies. I added a stand to the center panel and finished the project with silver corners on the top outside edges.
I hope you like my triptych frame as much as the recipient does. I have lots more Graphic 45 creations to show you and I'll be blogging them soon.